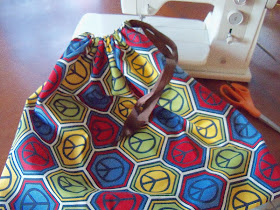
This tutorial is the first of a series of tutorials that will show how to make drawstring bags, pajama pants and simple blankets for Foster Care Kits. Let's get going!
Supplies:
2/3 yard of fabric for the bag
52 inches of twill tape, soft rope or ribbon for the drawstring
1 large safety pin
scissors
pins
yard stick or measuring tape
sewing machine
Cutting:
Make a mark at this point with a pen, pencil - whatever you have on hand. Move the yard stick up a few inches and make another mark. Continue until you have made marks all the way up to the top of the fabric.
Then simply cut along the marks. It doesn't have to be perfect, just decent. The selvage will not unravel in the wash, but the unfinished sides might so we are going to zig zag along both sides to prevent fraying.
Sewing:
Before we get going, let's talk about setting the stitch length and width.
There will be something like this on your machine. It controls how long the stitch is. 0 is no length and 4 is quite long. I like to keep mine at about 2.
Once you have the stitches set, place the corner of the fabric under the presser foot. Line up the cut edge of the fabric with the notch in the presser foot.
Once you are done zig zagging both sides, trim the threads and fold the fabric in half, the right sides of the fabric facing each other. The selvages should line up with each other at the top. Pin the fabric together along the zig zagged edges.
On one of the edges measure 2.5 inches from the top of the selvage and make a mark. You will start sewing at that mark.
Before you start stitching, change the width of the stitch back to 0 and identify the 1/2 inch mark beside the presser foot. Two marks out is the 1/2 inch mark. When you are sewing you will keep the edge of the fabric lined up with this mark. If you are sewing with children, you may want to place a piece of tape on the edge of the mark to make it more visible.
Place the presser foot on the edge of the selvage with the zig zagged edge at the 1/2 inch mark. Sew forward a 4 or 5 stitches, back stitch and then continue forward to the end of the fabric. When you reach the end, back stitch again.
To back stitch, you will need to lift and hold up a lever like this. Some machines have a button you hold down.
When you sew the side that you marked, start 2.5 inches down at your mark.
When you have stitched both sides trim off the bottom corner.
When both sides are sewn and trimmed, iron the seams open on both sides.
The notched side will look like this.
Next, fold over the selvage edge 1.25 inches so that the top of the selvage is even with the bottom of the notch.
Iron the selvage edge down all the way around the top of the bag.
Next, position the foot with it's left edge even with the selvage. Take a few stitches, back stitch and continue stitching all the way around the bag.
It should look like this. When you reach the beginning, back stitch again and remove the fabric from the machine. Trim the thread and turn right side out.
Now all you have to do is put in the drawstring. Find the biggest pin you have (bigger than this one!) and pin it to the end of your ribbon/rope/tape. You will use the pin to help guide the ribbon through the channel made by sewing down the top edge of the bag.
Place the safety pin in the channel at the top of the bag.
Hold the end of the pin with your left hand. Push fabric onto the pin with your right hand.
When you have covered the pin with as much fabric as it can hold, take a hold of the top of the pin with your right hand.
Pull the fabric off of the pin with your left hand. Repeat until the safety pin exits the other side of the bag.
Knot the ends together and you are done!!!
Congratulations!
You just made a drawstring bag!


Great tutorial! I made four start to finish in an hour with a toddler on my lap!
ReplyDeleteMy activity day girls (8-9 year old) are doing these on Tuesday. Should be fun! Thanks Leila! (Erica)
ReplyDeleteI need to make a bag with a 3' opening - how much fabric do I need/how do I alter the instructions?
ReplyDelete