

Months ago when we were paper piecing, someone sent me a link to this block and asked if it was possible to paper piece it. No such luck. In fact when I saw it I thought "there is no way I would EVER make that block" so of course I had to make it as one of the challenge blocks in the sampler. :)
I had started to hand draft the block, but Marlene was a total hero and drafted it up for us in EQ7. Thank you!!!
The Alice Brooks Butterfly Block incorporates the skills of using templates and sewing curves and inset seams. It will certainly put all of the skills we have learned to the test.

Do you have what it takes to make this last block in the
We Can Do It! Skill Builder Sampler? :)
(scroll down for instructions)

(scroll down for instructions)
............

Edited (4/15): The Skill Builder Sampler will soon be available for purchase in book form! It has been renamed "You Can Quilt! Building Skills for Beginners" but covers the same skills with the easy, medium and challenging blocks and is a million times better than the original quilt along. It is perfect for the beginning quilter or the experienced quilter who wants to branch out and learn new skills. Find more information and pre-order a signed copy in my Etsy shop or pre-order on Amazon . The Skill Builder Sampler tutorials will remain up until the book is released. After release, some will be removed.
............


The two pieces of fabric need to be mirror images of each other (one for each side of the butterfly). The easiest way to do this is to simply fold the fabric in half (right or wrong sides together), pin and cut out the piece.


Then flip the template over onto the backside and cut out the second piece.

Either method works equally well.


Sew together the three wing wedges (template V).


Pin as shown.


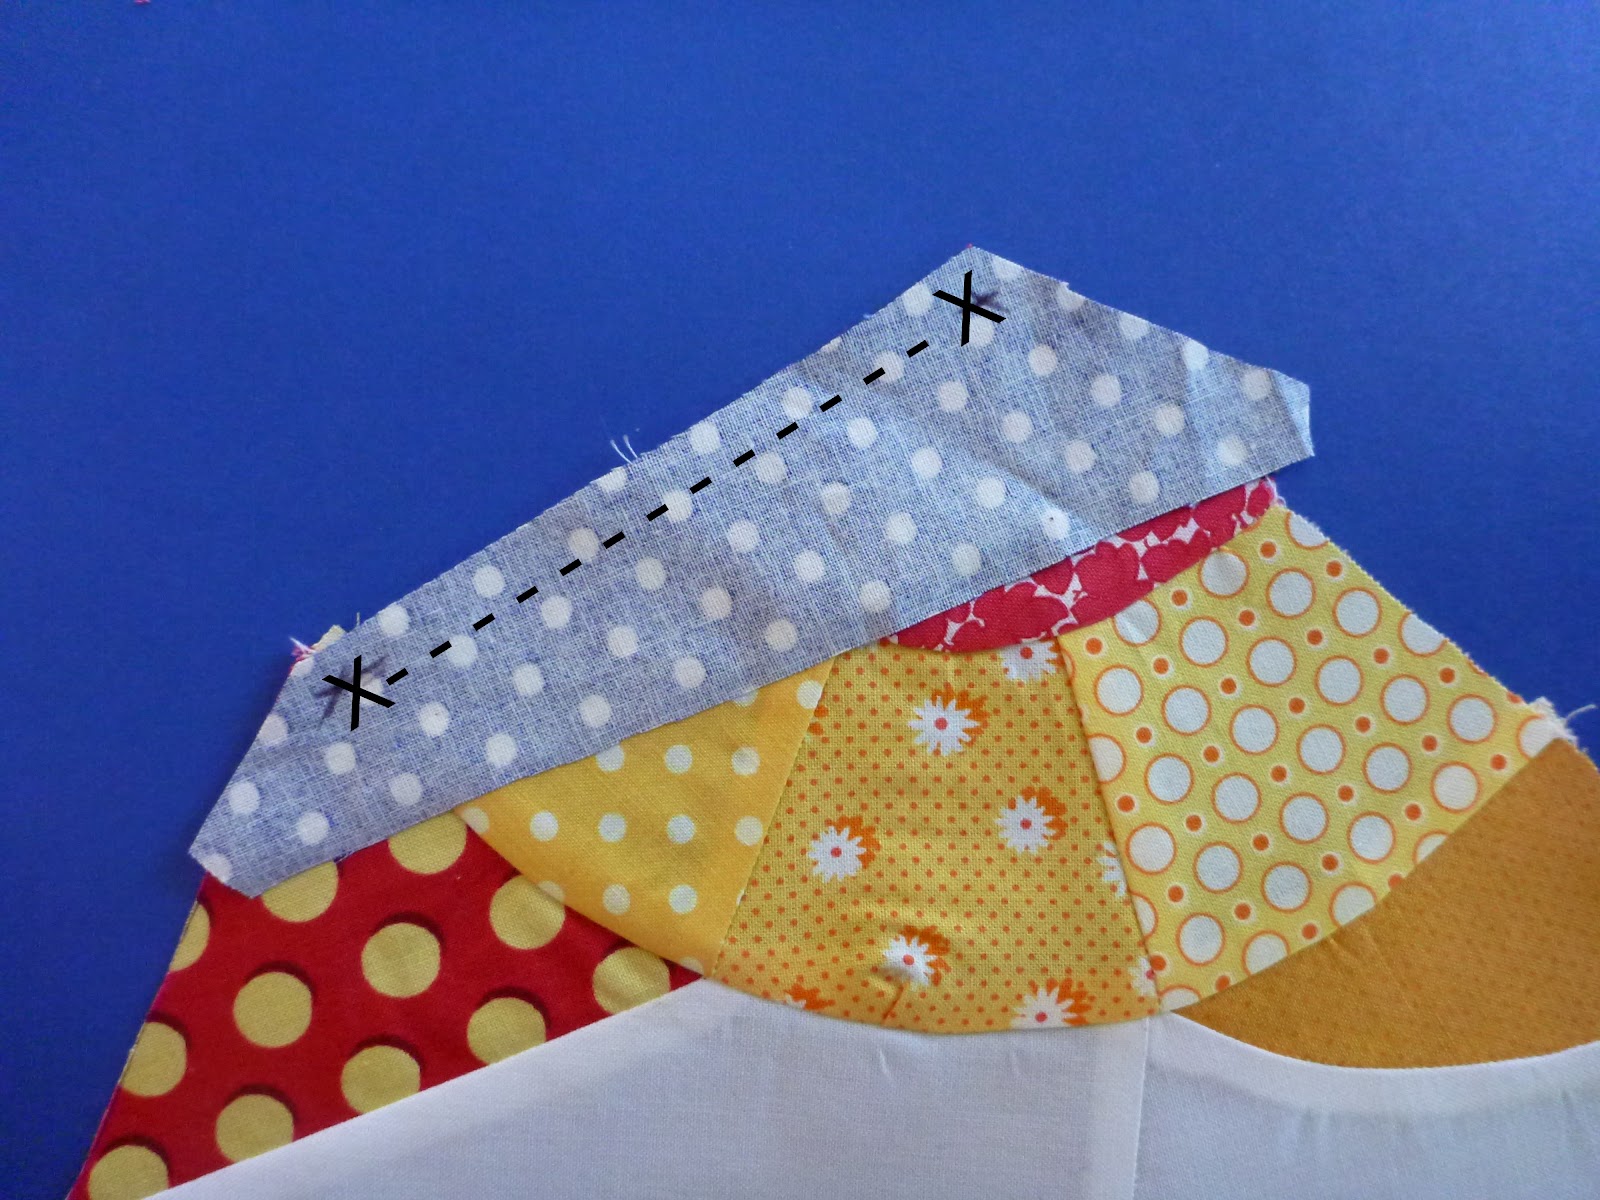


Sew the halves together and trim to 12.5 inches square if necessary.

I machine stitched mine with the zigzag width at 2 and stitch length at .5. I back stitched at the beginning and end of the antennae.
And that is it! The last block in the We Can Do It! Skill Builder Sampler. I can't believe it! Not that it is over - we still have to get these blocks turned into a quilt. We will work at a reasonable pace at that over the next few weeks to put the top put together. Tune in next Friday for a giveaway and the first step for getting your blocks turned into a quilt.

I am sooooooo excited about this block! What a way to round out this quilt along. Thank you so much for all your hard work Leila, you are a wonder!
ReplyDeleteI best get cracking...
This block is beyond my skill level right now, but it is lovely, and I appreciate your showing us all the steps.
ReplyDeleteCUTE!!! I'm still scared, though.
ReplyDeleteQue linda,obrigada.Já imprimi e vou fazer no final de semana.Te mando uma foto por E-mail depois de pronta. Deus te abençoe,estava mesmo precisando de novidades,beijo.
ReplyDeletewhoo hoo!! So glad they worked!!
ReplyDeleteHi Leila,
ReplyDeleteJust dropping by to say thank you very much for all your hard work and advice for the past 12 months. I haven't kept up to date with the last few months because I have been busy making charity quilt tops, which have all been the quick and easy variety for obvious reasons! I have learnt a HUGE amount from your tutorials, and have printed out all your instructions for the first dozen blocks. I didn't go on with the more complex ones though, because I'm not really into the paper piecing and more complex patterns. But it is great to see what others have accomplished!
Holy cow - it's a beauty! When I get back from vacation in a week I'll catch up and get the last couple of blocks done. Thanks, Leila!
ReplyDeleteI may have to try that cute butterfly:)
ReplyDeleteI just posted my butterfly to the flickr group and it suddenly hit me that it's all over! Sad! Thanks for the fabulous challenge, Leila. I never would have tried all these scary things like y-seams and curves without you.
ReplyDeleteDone! I am so excited! I have to go back and make one in my new fabric that I only have in the old stuff then I have 36 blocks! Thanks for all your hard work putting this together, it was so fun!
ReplyDeleteYour butterfly is gorgeous. Thank you so much for creating this well-written and photographed tutorial, and for linking to my post of this pattern. I re-drafted this block, eliminating the seams in the square background piece and the butterfly body, and also adding a 4th piece to the edges of the wing (to accommodate my vintage quilt pieces). This makes the stitching slightly more complicated, but also eliminates some of the bulk.
ReplyDeleteThat is a really nice block. I like it very much
ReplyDeleteButterfly is gorgeous, thanks!
ReplyDeleteI saw this block in a magazine many years ago & have been searching for it- to no avail!
ReplyDeleteThank you so so much....you have made my day
Where can I get templates
ReplyDelete