
Here we are! Ready to start sewing? Today we are going to make a crazy quilt block starting in the middle of our foundation fabric. This is my favorite way to make a Crazy Quilt block and most of my blocks are made this way.
Step 1: Choose a piece of fabric for the middle of your block. I choose a piece of green plaid skirt complete with the embroidered pocket. Your piece of fabric does not need to be square. In fact, do not make it square. Try a rough hexagon, trapezoid or triangle. Lay it face up in the middle of your foundation fabric.

Step 2: Audition pieces of fabric. I decided on this pink plaid for the top. It is a little too wide so I trimmed it up to be about the same size as the top of my green piece.

Step 3: Flip the fabric face down onto your first piece of fabric. Pin if desired.

Step 4: Stitch the pieces together using a generous 1/4 inch seam allowance.

Step 5: Flip the fabric up. Press if desired.

Step 6: Top stitch.
This is where all of the fancy stitches on your machine come into play. I only have 7 stitches on my machine, so I will be doing a lot of zig-zagging, but feel free to experiment with what stitches you have. You might want to keep a piece of scrap fabric by your machine to test your stitches on before top stitching your actual block.
Thread. You will want to use thread that contrasts nicely with your fabric. I, personally, hate changing thread so I sew on all the patches with the same bright pink thread that I top stitch with. And yes, all the top stitching is in the same color. Why? Because I am lazy. But please, feel free to change your thread as much as you want.
If you are going to add decorative hand stitching, wait until your block is finished.
Those are the basic steps. We will repeat those steps until the block is finished. On we go!
Next: Audition, trim, flip, stitch, flip and top stitch the pink piece of fabric.

Notice the square in the corner. I wanted to take care of that next.

I thought this piece of denim would do nicely, but I wanted to lay it diagonally across the corner to break up the boxiness of the block. (Be Crazy not square!) However, I didn't want the block to be too bulky, so I did a rough trim of the light and dark pink fabrics.

Much better. Let me show you a trick for cutting that corner piece.

Lay the piece of denim underneath the block. Be sure the denim overlaps the pinks by at least 1/4 of an inch.

Next, simply rough cut around the edge of your block. Voila!

Next: Flip, pin, sew, flip and top stitch.

Oops! I didn't overlap the pieces enough and missed the corner of the light pink. I could unpick and restitch (eek!!) but let me tell you about a crazy trick. Trim. If you have any problem spots, raw or puckered seams, feel free to cover them in trims. My favorite trim is ric-rac. It is a happy trim that curves beautifully.

To fix my problem spot, I simply did a little zig-zag over the raw edge and stitched on some ric-rac. You could also stitch on a button or appliqué another piece of fabric on top. If you are adding a thick ribbon or lace you will want to top stitch near the edge on both sides of the trim.

Ah...Much better.
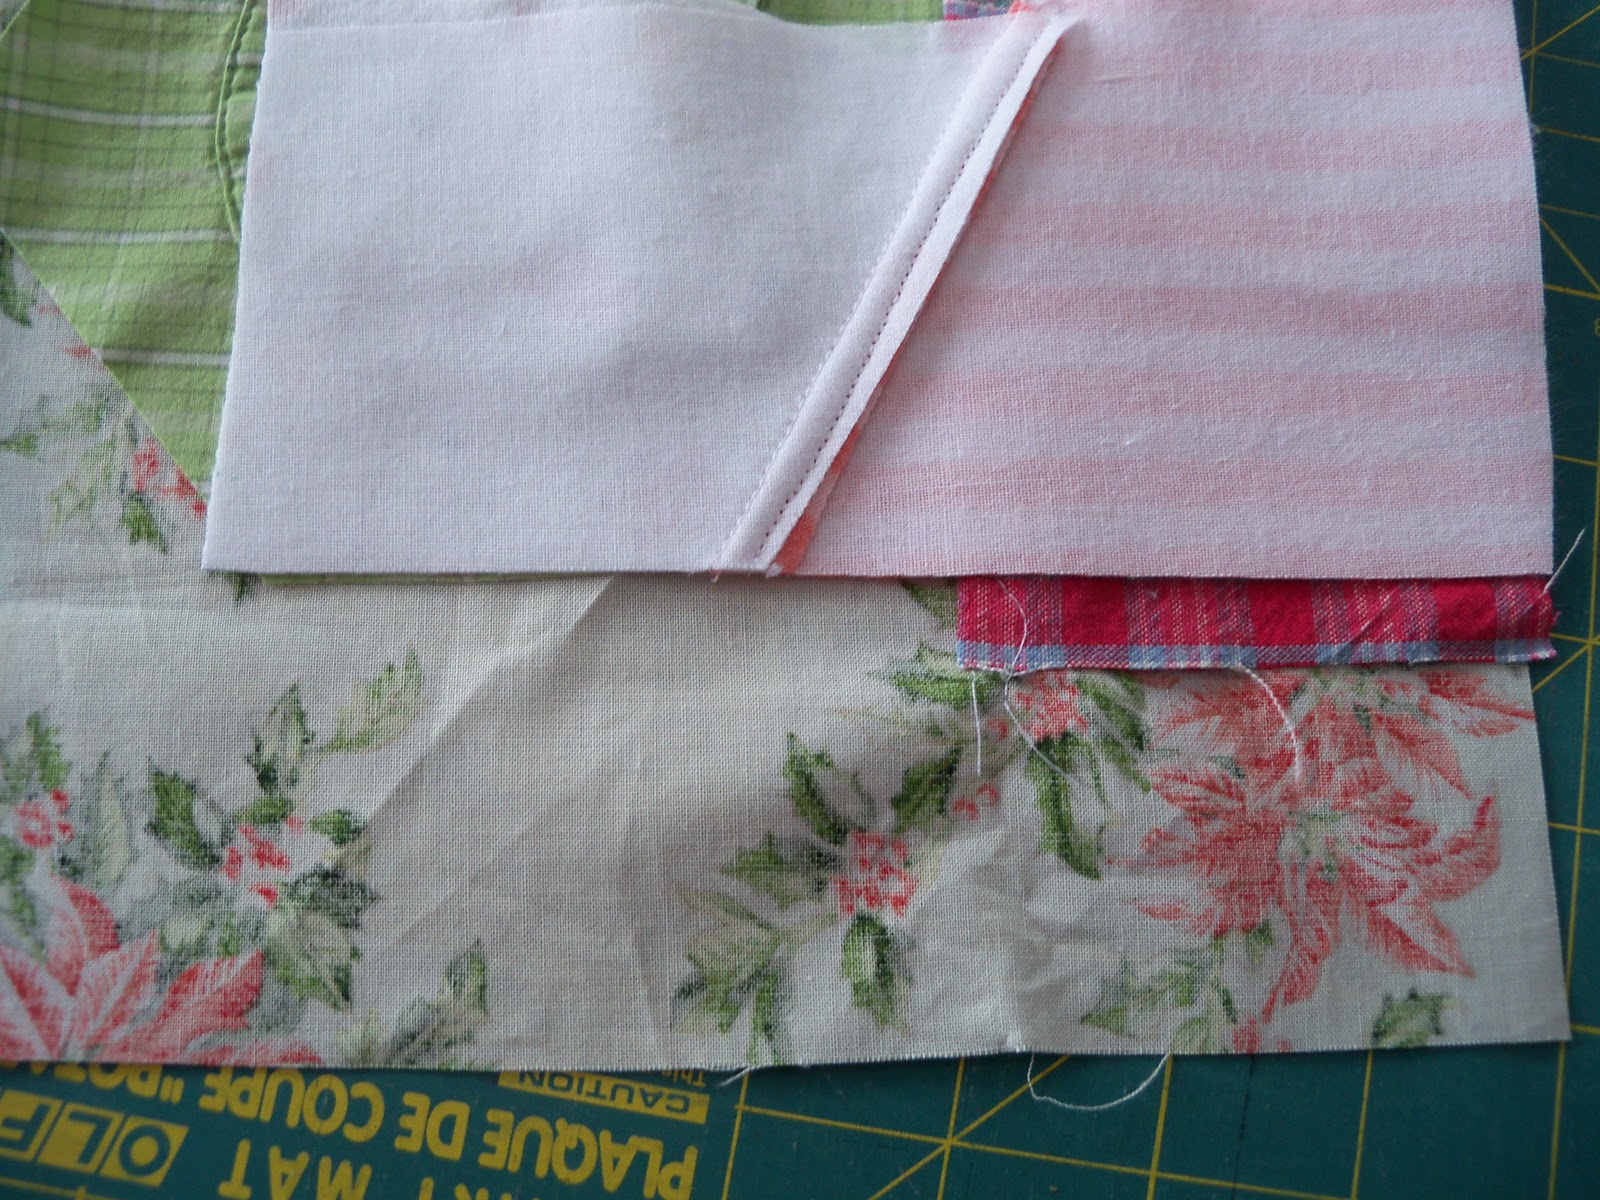
Next. I wanted to add some cute onsie fabric to the upper right hand corner of the block, but it was pretty flimsy and stretchy.

I had picked up some SF101 Shape Flex pellon at JoAnn's and decided it was time to iron it on. The Shape Flex is a light weight muslin backed with iron on adhesive. There are many kinds of fusible interfacings you can use, I just liked this because it had more of a fabric feeling. Be sure you get an interfacing that only has adhesive on ONE side.


I auditioned the fabric, but there was just too much white.

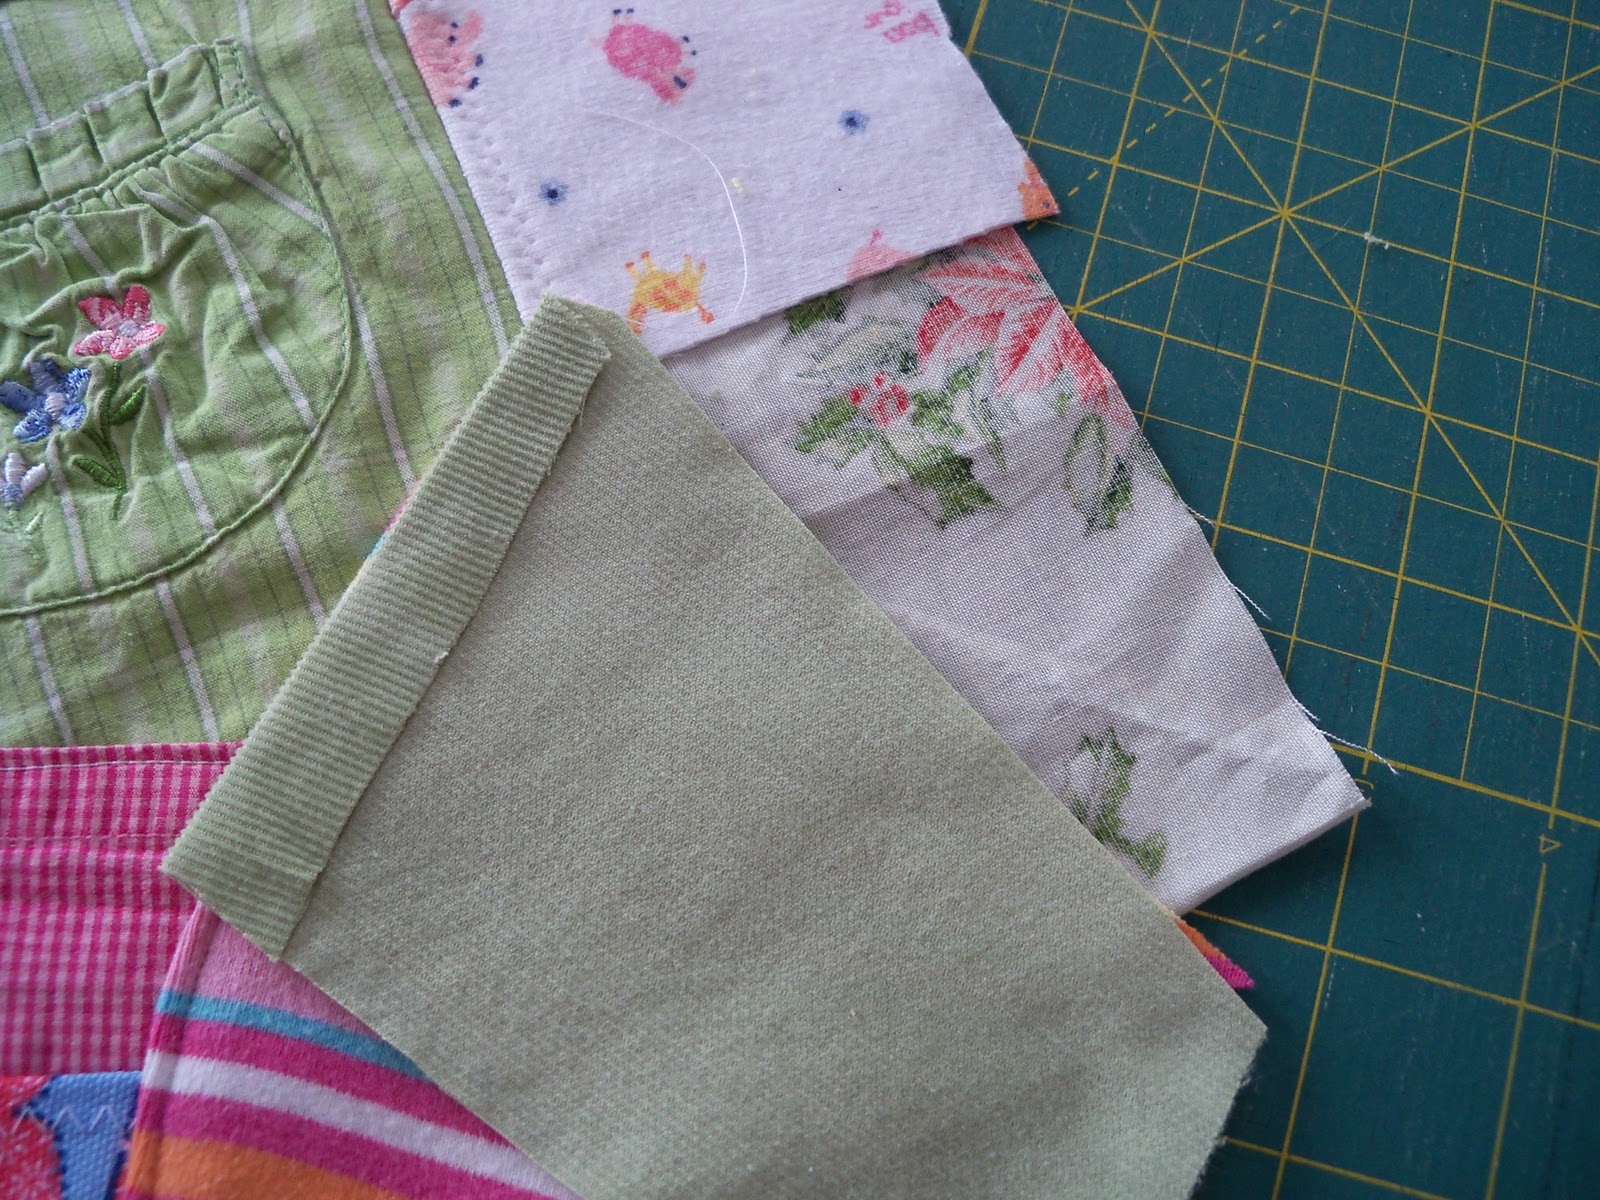
Maybe some white and stripe? Much better, but too straight line-y. We are trying to make a Crazy Quilt after all! So I cut two strips of the fabric and rough cut some complementary angles.

It is easier to sew them together at this point and then stitch them to the block together in a straight line. So, line them up like so....

Stitch, flip and top stitch.

Kind of wavy, huh? Trim one edge to a straight line and sew onto the block.
Flip and top stitch.

Notice how I decided to put the stripe in the corner instead of the white like I had first planned on? It is ok to try things different ways. If things go differently than you planned, roll with it. It's a Crazy Quilt.
Next, I decided to focus on the lower left hand corner. There is no order to where you should add pieces. No need to go clockwise or counter clockwise.


Voila! Easy as pie.

Next, I added a piece of blue to finish off the corner.
Notice how the empty area in the corner looks kind of like a quarter of a circle? I decided to add a curved piece next.

When adding curved pieces it is usually best to iron under the edge in a curve and then top stitch it onto your fabric. Knits are especially easy to turn under in a curve. After pressing and top stitching on the striped fabric, I was left with one wedge shaped area to fill.

A beautiful green corduroy would look nice, but notice I have to attach it on two sides. This is a sticky place that will happen often as you put your blocks together.
The best way to deal with it is to:
- Iron under one of the edges that need to be attached.
- Sew on the other side like normal
- Flip and top stitch the loose side that you pressed under
Iron under and Stitch on opposite side

Flip

And Top Stitch
Did you notice the raw edge peeking out? Again! I just zig-zagged over it this time to reinforce it.

Almost done! Just use the 9 1/2 inch ruler (or whatever size you are using) and trim it up.

Beautiful!
So, just to summarize, today we learned:
- How to use the basic flip and stitch method to attach fabric to the block
- How to top stitch on trim
- How to use interfacing
- That you can sew pieces of fabric together BEFORE you sew them to the block
- That if the edge of the fabric is finished you can simply top stitch it onto the block
- That the easiest way to add curved pieces is to turn under the edge and top stitch and
- How to turn under on edge of the fabric before sewing it on to the block when there are two edges that need to be attached.
Augh! That was a lot! Basically, you just want to keep adding on odd sized pieces of fabric until your foundation block is full. That is what it all boils down to. So, go give it a try and let me know if you have any questions. (This is the longest post I have ever written, so I am sure there are a few rough places.)
Now go Crazy and get sewing!
I love this wonky look, it is so much fun!
ReplyDeleteWhere in IA do you live? My boyfriend is from there!
(I came to your blog from the flickr page for Lily's quiltalong, I am taking part as well!)
Thanks!!
ReplyDelete