
Fans are a common motif in traditional crazy quilts.

This crazy quilt is made entirely of fan blocks (source).
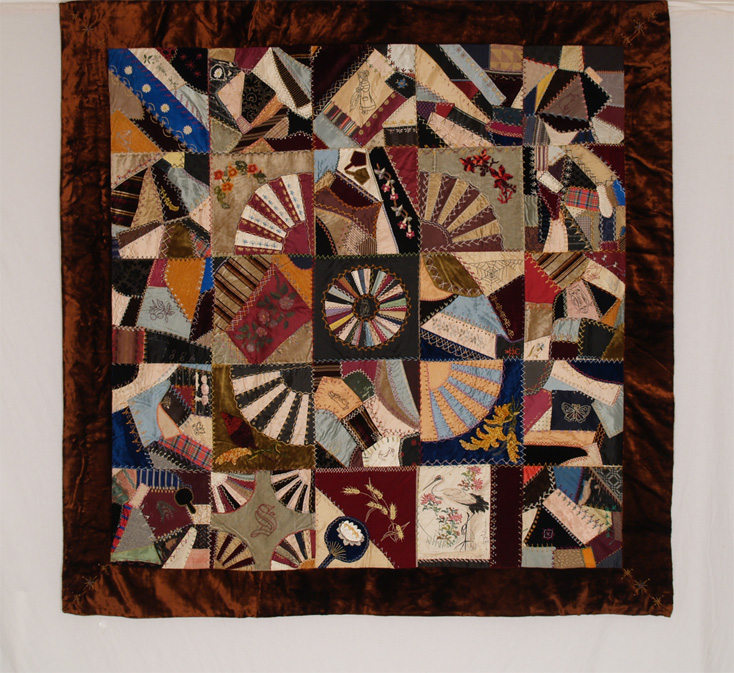
While this one features fans in selected squares (source). While the quilts are crazy, the fans are not. They are pieced with exactness. I am going to deviate from tradition and will show you how to make "liberated" fans. Cheater fans if you will.

Step 1: Cut 5 or 6 wedge shaped pieces of fabric 6-7 inches long. Don't stress too much over it. Just cut. They don't have to all be the same, in fact the ones on the edges should be shorter than the one in the middle. If it makes you feel more comfortable you can use one of your "favorite" wedges as a rough pattern for the others.

Step 2: As you cut, lay out your wedges on the foundation fabric to check that they cover the block.

Step 3: Sew them together off of the foundation fabric. Let me say that again because the pictures are deceptive - Do not attach the fan to your foundation. Add any fancy machine top stitching you desire.

Step 4: Check to make sure the fan is large enough and trim edges. The seam allowances will cause the size of the fan to shrink and you may have to add another wedge to the edge (I love how that rhymes). Mine shrunk but was just wide enough to work. Trim off any rough edges and fashion a smooth curve along the top and bottom edges.

Step 5: Free hand cut a quarter of a circle. I like to error on the side of safety and cut mine too large and trim off any excess from the sides.

Step 6: Turn under the edge 1/4 of an inch (or so) and top stitch onto the fan and foundation fabric. Add decorative stitching as desired.

Step 7: Place a piece of fabric under the top of the fan and do a rough trim around the edge of the foundation block.

Step 8: Lift the fan and trim away any excess fabric.

Step 9: Turn under the top of the fan 1/4 inch and top stitch to the background and foundation fabric. Add decorative stitching as desired (or in my case trim).

Step 9: Trim you block to size - 9 1/2 inches. Fini!

Here are some other fan blocks I made. This one ended up smaller and lopsided, but I kinda like it. I added some trim and another patch in the upper corner so the rest of the block didn't look so empty. I also used a straight piece as the center of the fan, instead of circular.

This one had skinnier wedges so I used 6 instead of 5. Can you tell I have a thing for ric rac? It curves well and is so cheerful!
If you have any questions let me know. I hope to see some fun liberated fans on the ORBQA fickr page.
Those are fun! That quilt is going to be really fun!
ReplyDelete