Tuesday, November 1, 2011

Baby Jane's Quilt


I would never have pegged pink as a fall color, but last month I noticed the leaves on one of our trees had definitely turned pink - not red.  I didn't take a picture, but I searched on flickr and found many more pink leaf pictures - it wasn't just me who had pink leaves .  Why the pink leaf interest?

That is Plants - not Rants - for sale.  :)
Because of Baby Jane's new tumbler quilt!  A new niece is on the way and so I "had" to make her a little quilt. My SIL is decorating the nursery in pinks and orange - love the combo - and the more I worked with those colors the more I was reminded of the more subtle colors and changing leaves outside.  As an added bonus, I was able to pull all of these beautiful fabrics out of my stash! - many of them are from the Meadowsweet line (oh, how I love working with them).

The backing was pieced out of Heather Bailey Bijoux and Meadowsweet Henna fabric.

The finishing touch was the double border.  I attached a flange of fushia and then finished with orange binding.  I love how it turned out - although next time I will only cut the binding 2 inches wide.

The quilt is approx. 36 x 46 inches.
I hope you enjoy it Baby Jane!

I am linking up to:

{Sew} Modern Monday at Canoe Ridge CreationsCelebrate ColorAmy'sCreativeSide

Friday, October 28, 2011

Blocks 13-15 Giveaway

 This month's blocks in the Skill Builder Sampler weren't exactly normal, were they?  We started off with a paper foundation string block, then a fabric foundation crazy quilt block and finished up with a paper piecing practice block.  We have started to leave the basic quilting skills and are moving into skills that we might not have practiced before.  Kind of scary and uncomfortable.

Coming up in November we will continue to work on paper piecing, in December we will practice applique and in January we will start the year off with curves.  Now would be a great time for quilters who feel comfortable with the basics, but who want to stretch their skills to jump in.

If you have fallen behind, no fear, catch up as you can.  These tutorials will be there when you need them.  But...the half way mark of the We Can Do It! Skill Builder Sampler is at the end of November and there will be a larger than normal giveaway for everyone who has completed all of the blocks.  Enough fabric to make a lap sized quilt!

But for now, if you have completed Blocks 13-15 leave a comment below and you might win a "mini layer cake" of Echino fabric.  There are nine 9 inch squares of various prints from the Nico Spring 2011 collection.  I didn't see why everyone gushed about these cotton/linen blends until I got some in a swap.  I love the feel of the heavier linen and the prints are really fun.  If you don't win and want to buy a package click here.

Giveaway Closed

Thursday, October 20, 2011

Des Moines AQS Quilt Show

Almost three weeks ago I went to the Des Moines AQS Quilt Show with my friend Julie - yes, I had someone to go with!  :)  We had a good time and saw lots of great quilts and fabric.  I thought I would finally share some with you.

 I really liked the vibrant colors and black background of this quilt.

 I loved this scrappy hexagon quilt with the black "sashing."

Almost better than the quilt was the name of the quilt, "Why Do People Think I'm Crazy?"  Who in their right mind would think she was crazy for piecing together thousands of tiny hexagons?  :)

 I loved the colors and all the different blocks in this quilt.  The funny thing was that just a few quilts down was the same quilt done in a different colorway.

 I love simple red and white applique.  Something like this is on my quilt life list.

 Julie pointed out the cool scalloped border made by the bat wings in this quilt, and as I stopped to take a closer look...

 I noticed that it was made by Becky Larson from Huxley, IA!  My little town of 3,000 had a quilt in the ASQ section of the show!  I have no idea who she is, but I thought it was pretty cool.

 This is a closeup of a Hawaiian style applique quilt.  At first I thought that the shiny red buds were made from fabric, but they are made up of very close lines of stitching with metallic thread.

 Love these applique poppies!

 After checking out the quilts and vendors in the main show area, we went into the arena where the local Des Moines Area Quilt Guild was having their show.

 I thought this idea of using bandannas for a quilt was brilliant - although I think I would chose ones not so Americana.

A postage stamp quilt.   This is also on my list of things to make.

 I really liked the simplicity of this green and blue quilt.

 Loved the simple tiny blocks in multiple frames in this small quilt.

There was a section of the show with various WWII quilts.  This was one had appliqued badges from Navy uniforms on the front.  The woman who made it would trade the sailors a pack of cigarettes for a badge.  ?!?

When I looked closer, I could see that the badges had many different symbols on them - different Navy duties/jobs?  Pretty cool.

I had a good time, although I am pretty sure that the show has gotten smaller over the last three years.  I was hoping to find some specific vendors I had seen the previous two years and they weren't there.  Humm...  I mentioned to another quiltly friend that I was disappointed that I hadn't been able to find some of the fabric I had been hoping to see and she said, "You go to a quilt show to see vendors?"  Umm...yeah?  In case you were wondering, I totally scored some out of print American Jane prints and a Fairy Tale Friends charm pack.  :)

I am already trying to figure out a way to go to the International Quilt Festival in Cincinnati in April or Spring Quilt Market in Kansas City (only a 3 hour drive!) in May.  I don't qualify as a vendor or a buyer, but maybe I could help at someone's booth?  A girl can dream, right?

Friday, October 14, 2011

14 - Crazy Quilt Block


Today we will be making a Crazy Quilt Block with a fabric foundation.  Since crazy quilt blocks are normally made with many different types and weights of fabric (silks, knits, cotton, polyester and wools) having a sturdy and unstretchable base to attach them to is a must.  The base also allows odd shaped pieces to be added fairly easily.

............


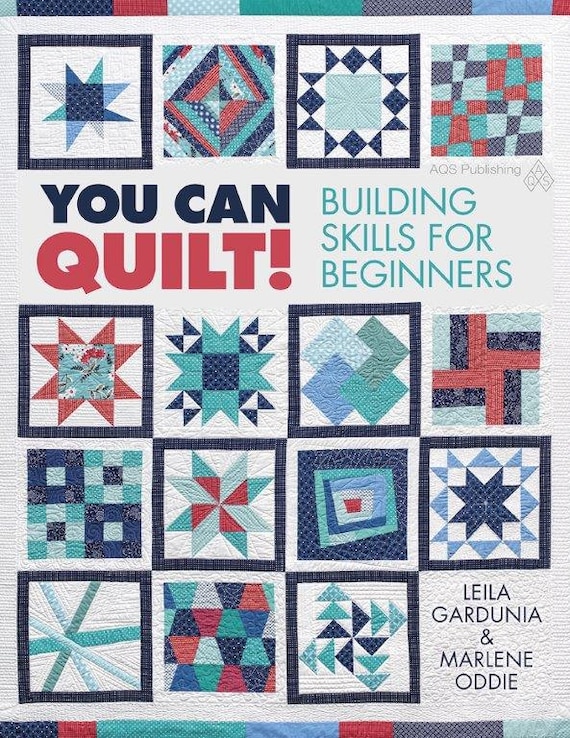
Edited (5/15):  The Skill Builder Sampler will is available for purchase in book form!  It has been renamed "You Can Quilt!  Building Skills for Beginners" but covers the same skills with the easy, medium and challenging blocks and is a million times better than the original quilt along.  It is perfect for the beginning quilter or the experienced quilter who wants to branch out and learn new skills.  Find more information and order a signed copy in my Etsy shop or order on Amazon.  
............

Crazy Quilt made from my girls' clothing.
 I have a soft spot for Crazy Quilts.  One of my Life Quilting Goals is to make a "real" crazy quilt out of wools and silks with tons of embroidery.  Don't hold your breath, it won't be in the next 5 years, but someday.  :)  I have, however, made a Crazy Quilt out of my girl's worn/stained clothing and I love it!  It was really fun to make and I plan on making more as the girls wear out more of their clothes.  I even wrote up a series of tutorials for making a Crazy Quilt this spring - it seams like ages ago...  Well, enough talk, let's get started.

1.  If you are going to use any non-quilting cottons in this block, be sure to prewash them in the same manner you will be washing your finished quilt.

2.  Cut your foundation fabric approx. 13.5 inches square.  You can use any type of woven cotton for this.  In fact, I would suggest using a piece of why-did-I-buy-this-and-what-in-the-world-am-I-going-to-do-with-it? fabric.  Just be sure the foundation fabric will not show through the crazy quilt fabric that will go on top of it.  If it helps, you can sew on the backside of the foundation fabric over so the pattern is less intense.

3.  Collect your fabric.  I would suggest rounding up all of the scraps and odd sized pieces you have leftover from your other blocks and starting with those.

4.  Start Sewing!  Follow the directions for the Center Oriented Block.  The only thing that will be different, is that we will trim our block to 12.5 inches square when we are finished.   Don't get too stressed about the process - just keep adding fabric until the foundation fabric is covered.  For more info on adding trims and curved pieces, check out the Corner Start Block post.

 When it come down to it, this is really an improvisational block, so don't stress, just keep on adding pieces of fabric.  You can do it!  :)

Monday, October 3, 2011

Tree Quilt

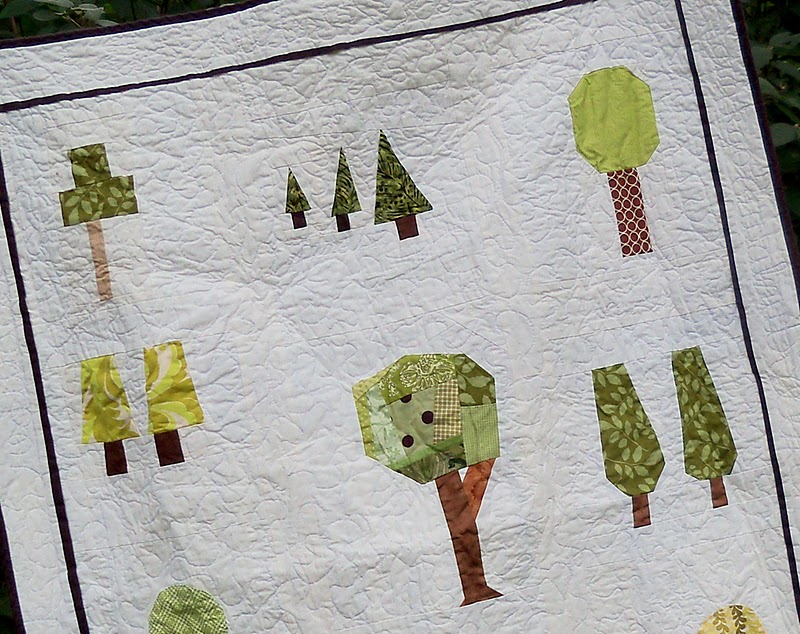
 This quilt is finished and has been sent off to it's new owner.  She loves it and so do I.  I had such a fun time making this.  I loved piecing all the different types of trees.   To keep the record straight, I must admit that the tree in the top left corner and the pieced pines in the bottom left corner are from a bee I was in last year.  The blocks had gotten lost under some fabric for a year - oops! - and I am so glad I had a chance to use them in this quilt at last.

This central tree is the fanciest of the bunch.  I love the improv top and cool trunk.

 My husband said this tree looked like a mushroom.  What!?!?  It's totally suppose to be a willow.  It even has the leafy-going-towards-the-ground fabric!  But his comment turned out to be a good thing.  I quilted the word "willow" along the left edge of the tree so no one else could make the same mistake.  :)  Then I decided to add quilted labels to the other trees I thought looked like specific varieties.

 Poplar

Pines (beneath the small pines - it's hard to see)

Then I was on a writing roll.  In the border, I "wrote" the names of many different trees (oak, redwood, walnut, cherry, ginkgo, elm, maple...) separated by a bit of meandering quilting.  Love, Love, Love It!

 The back turned out well too.  I really like the poison green Civil War reproduction fabric paired with Kate Spain's green leaves from Central Park.  The Kona Espresso stripe on the back gave the backing the length and classiness it needed.   Is is just me or does quilting with white thread on a dark background give anyone else hives?  Thankfully, all went well.

Sometimes it is hard to tell from pictures what a quilt is really like.  Sometimes quilts can look good in the pictures (like the purple Amish Braid) and be horrid in real life.  I just want to let you know:
This. Quilt. Is. AMAZING!  
It is seriously the best work I have ever done.  It feels so good to make something I can really be proud of.  I hope I can keep it up!

Quilt Stats:
Finished Size:  approx. 40 x 52 inches
Fabric:  Kona Unbleached and Espresso and a variety of green and brown scraps


{Sew} Modern Monday at Canoe Ridge CreationsCelebrate Color

Bonus Block #2

I totally forgot about the bonus block this month.  It has been a challenging month, the details of which are a bit too personal to share online, but I think things are looking up now (knock on wood!).   So hopefully, I will be sewing more, posting more and forgetting less.  :)

If you would like to make an extra block this week, here are some ideas:

You could make a wave runner block using Victoria's tutorial.


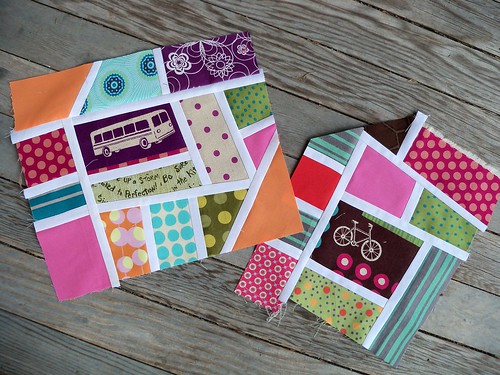
Improv. Blocks
Or blocks like this using the Mod Mosaic Floor Pillow tutorial from Oh, Fransson!  With both tutorials remember that your blocks will need to be 12.5 inches square if you want to use them with the other blocks in this sampler.

30's block of the month - october
From knitsmith on Flickr
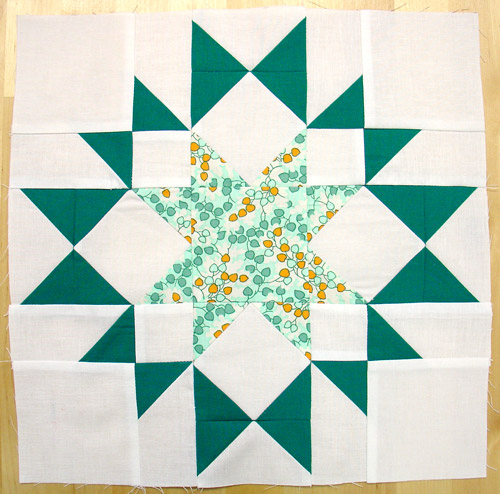
For a more traditional bonus block, you could make the Green Mountain Star block.  It has quarter square triangles, flying geese and corner to corner sewing.  Wow!  Great review block and sooo pretty.  Thanks to Em for sharing this block.

If you make any of these blocks in any size leave a comment on the giveaway post for an extra chance to win.  Happy sewing!

Friday, September 30, 2011

Block 10-12 Giveaway

It has been a busy week around here.  I am glad it was a catch up week for the Sampler.  Next month we will start exploring foundation pieced blocks.  But for now, leave a comment below if you have finished blocks 10, 11 and 12 in the We Can Do It! Skill Builder Sampler.  I will draw a winner from the comments Friday, October 7th after the kids go to school.


This month's prize is a fat quarter pack of these fun prints from Treasures and Tidbits collection by Robert Kaufman.  So cute!  So get sewing!!  :)  I hope you have a great weekend!


Tuesday, September 13, 2011

Amish Braid - My First Bake Shop Project!!!

Amish Braid
I'm feelin' a little crazy!  My first Moda Bake Shop project is live!  Jump on over and check it out.  

In honor of the event, I wanted to write a post about the ins and outs of my first project.  I really appreciated Rachel's post last month about the behind the scenes process of being published in Stitch Magazine - maybe I will submit a project to a magazine next? - and wanted to pass on the favor to others.

Moda Bake Shop

I was completely clueless but knew I wanted the "fame and glory" of being a "Moda Chef."   (lol at self)  Anyway, I started thinking of ideas using solid precuts.  I decided to focus on solids because:
  1. I didn't know for sure if Moda provided the fabric and solids are cheaper  than prints
  2. I wasn't sure I could get my hands on newly released precuts and worried even if I did that the line of fabric would be discontinued before I finished the quilt.  :)  Solids never go out of print.
  3. No one uses solids in tutorials and I thought I might be able to get my foot in the door by spinning the project as a great way to increase awareness of Moda's precut solids.
The "design concept" I emailed.
I sketched out this idea back in October when I just started my blog.  I sat on it for six months until I got up the guts to email the Bake Shop about my idea.  I don't know where I dug up the email address, but I got back a kind email directing me to the Chef Application Page.   When I went back and looked at the Bake Shop site, "Submit a project idea...  apply here" was staring right at me on the side bar right above the pictures of Fresh Fabric Treats.  Duh.  

Anyway, I got started filling out the online paper work.  It is fairly straightforward.  After name, address etc. they ask you about your blog, a specific example of your work, why you want to be a chef and a description of your proposed project.  They would also like you to attach a picture or sketch of the project.

For an example of my work, I linked to my Diamond Quilt tutorial.  I figured they would like an example of my tutorial writing, not just my sewing.  Plus I think the Diamond Quilt is way too cute.

For the why do you want to be a chef question I wrote something appropriately awkward and hopefully not too gushy.   In plain english?  Because chefs are totally cool, no one reads my blog (at the time) and I would like to get some of my awesome ideas out there.  ;)

For the project description I played up the use of solids, wrote a few sentences about the basic construction of the quilt and listed the precut and fabric requirements.

Then I checked my email multiple times a day for a week until I got the "...we would like to feature your project on the Bake Shop!"   I was directed to email them the fabric requirements needed to complete the project and they would send the fabric to me.  Sweet!  I had thought they probably provided the fabric but now I knew for sure.   A few days later I was sent an "invite" link so that I could have access to the Moda Bake Shop site and create a post.  A week later I got my stack of fabric in the mail.

We were all excited to receive the fabric.
I could reach the Moda site though my google dashboard and create and edit my post all I want during the sewing process.  However, summer happened and my sewing process totally stalled.  About three months after I received my fabric, Jenny emailed and kindly inquired after the state of my project.  Eeek.  I promised to have it done by the end of August.

After I finished writing the post, I emailed Jenny and told her it was ready to post.  She/others? reviewed it and scheduled it for publication.

I was worried that I had ruined my chances at getting another project approved because this one took so long to finish, but I sent in a series of small project ideas and one quilt idea yesterday and they were all approved.  (Happy Dance!!)  Once you are accepted as a chef you can just email in project ideas - no more painful "why do you want to be a chef?" questions.

Moda chefs are allowed to post a project once a month and I have four months of projects set up.  The first three are non-quilty things I can make in an afternoon and the fourth is a quilt made out of this fabric that I plan to have done by January (knock on wood!).


I think one of the funnest parts of planning a project is picking out what fabric to use.  If you go to the Moda homepage and click on fabric collections it will bring you to a list of current and future fabric collections.  Then you can click to see swatches of the fabric in each collection.  Way too fun.

So, to sum up this rambling post, if you want to be a Moda Bake Shop Chef:

-Think of a project using precuts.  They are always looking for non-quilt ideas.
-Make sure it is a project you love and that you would make anyway.  The free fabric and "glory" are not worth the pain of working on a project that you don't enjoy.
-Search the Bake Shop site to make sure no one else has written a tutorial for your project yet.
-Pick out fabrics you would like to make it in - choose three back up lines just in case.
-Sketch out your idea.
-Fill out the online paper work and get ready to create!


Do you have any questions?  Are there any other Chefs out there who have had different experiences or advice they would like to share?