Saturday, December 22, 2012

Improv. Asterisk Block Tutorial

I could have sworn there was a tutorial for this block somewhere out on the web, but I can't find one, so here is my own tutorial for a 12 inch square Improvisational Asterisk Block.  I think a whole quilt of these would be amazing!  (You might also want to check out this Shattered Glass Block Tutorial or this Basic Asterisk Block Tutorial).

To get started:

  • Cut 3 strips approx. 18 inches long and 1.5-2 inches wide
  • Cut 1 square approx. 14 inches to a side


Cut the square in half on the diagonal.
Place one strip between the cut edges.
Sew the strip to each cut edge.

Cut the square in half again at a different angle.
Sew the second strip in between the cut.
Be careful to line up your first strip on either side of your new strip.

Cut the fabric in half again where the two strips intersect.
Sew the last strip to either side of the cut.


Press and trim to 12.5 inches square.
Done!  Easy as pie!

Tune in later to see the finished quilt and have a Very Merry Christmas!


Friday, November 30, 2012

Neutral Prisms

 I am so excited!!!  I just finished sewing the binding on this quilt, taking pictures of it and entering it into the QuiltCon Quilt Show!!!  It has been a whirlwind of sewing around here this week, but I made the deadline!

 Let me tell you about this quilt.  I was inspired to start it quilt as part of the Patchwork Prism Quilt Along hosted by Bianca of Sweet Diesel Designs . The pattern is Anna Marie Horner's Patchwork Prism. A free download of the pattern can be found here.  AMH's quilt features a rainbow of colors, but I decided to see what I could do with neutrals.  Here is the stack I started with in April.  There were a variety of fabric types and weaves so I decided to both prewash (a rarity with me) and use a 1/2 inch seam allowance to allow for any possible fraying.

The  official entry picture!  The quilt measures 53x45 inches.
I was going to start with a dark center and fade to light, but it just didn't look right so I switched it out and went with a light center.

Once the top was finished I decided to experiment with hand quilting - I had never hand quilted a quilt before.  I outlined quilted the shapes with perle cotton.  I wasn't sure about quilting though lots of layers, so I used a layer of muslin as batting.  My husband says it isn't very warm, but I told him that it is a summer quilt finished very early -- not very late.  ;)  I quite enjoyed my very primitive quilting.

Love the tree shadow!
I learned about facing bindings at a Modern Quilt Guild meeting a few months ago and decided to use one on this quilt. A facing binding folds completely to the back of the quilt and is often used in art-type quilts.  Here is a tutorial describing the technique.  I like how it allows the pattern to extend to the very edge of the quilt.

Can I just say, "Yea!!!" one more time?!  :)
Did you entered a quilt in the QuiltCon Show?  Neutral Prisms was entry #539 and Orange Trails was #545, so I know there are a bunch of you out there -- not to mention all of those who are madly sewing bindings and typing up entries before the midnight deadline tonight.  But more importantly are you going?  I am 99% sure that I am and I would love to see bloggy friends for real there.  :)

I am linking up with Finish It Up Friday and At the End of the Hallway.

Monday, November 26, 2012

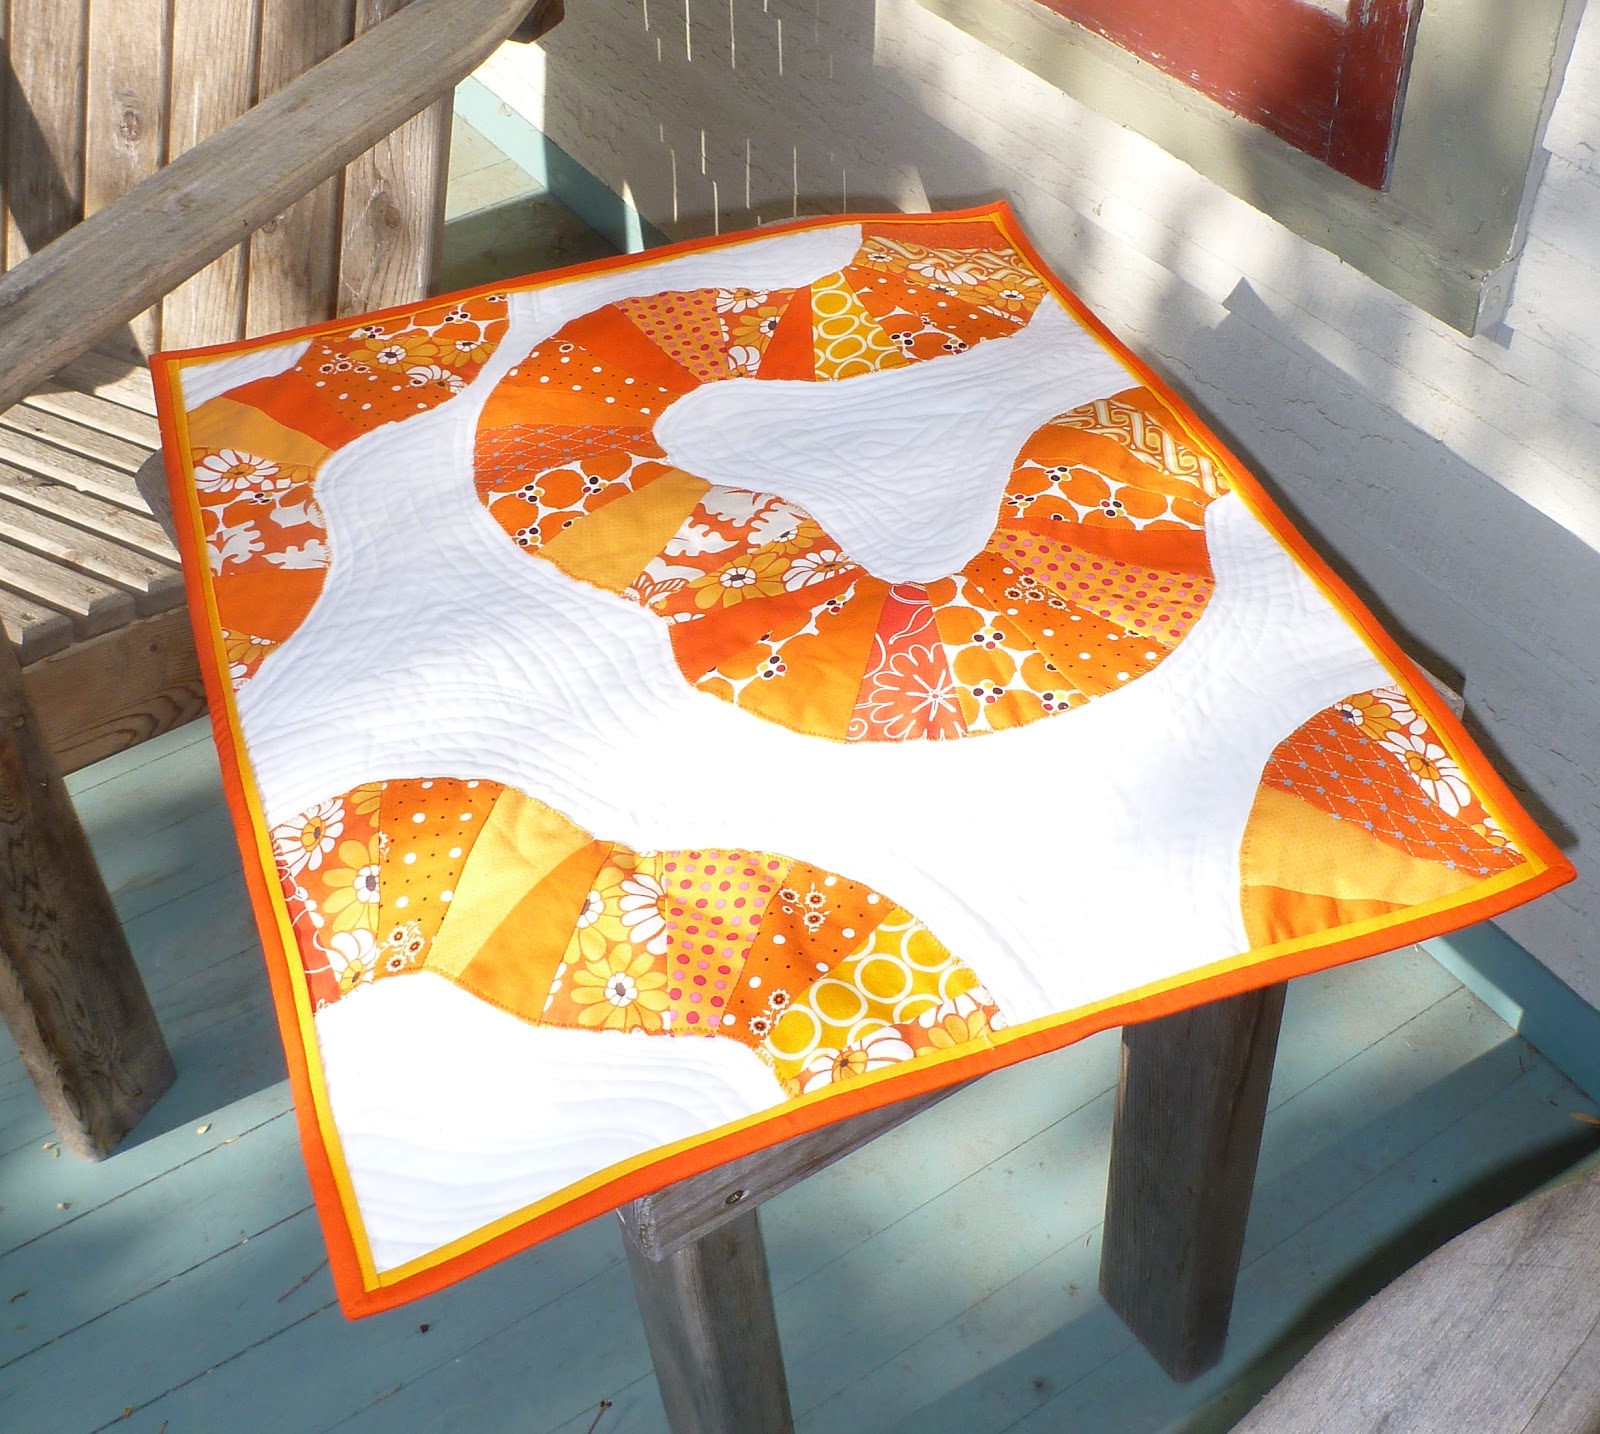
Orange Trails

 I finished this up awhile ago, but hadn't posted it because...well, real life is busy.

 It finishes at approx. 24x18 inches.  I think this side is up, but I am still not sure.  The squiggles were improvisationally pieced with various shaped wedges.  Then I turned under the edges and appliqued them with a zigzag stitch to the white background.

I added a flange before sewing on the binding.  I love the look it gives - like a mini double border.
Baby is crying...time to go!  :)


Wednesday, November 7, 2012

Work In Progress


This is what I was working on last night as we flipped between watching the latest episode of Castle and election results.  It will be my first hand quilted quilt!  More pictures later.

Linking up with WIP Wednesday!

Sunday, November 4, 2012

Undecided?


I don't know how anyone could still be undecided about who they will vote for for president - will the campaign ever end?!?  But here is a hilarious skit about the undecided voter to lighten your ad heavy days.  :)  Enjoy!   And remember to vote!

Thursday, October 25, 2012

Getting Things Done...Kinda


Orange Wonky Wedge Quilt
On Tuesday I was whining to my husband that I "never get anything done."  He pointed out all of the things that I had gotten done that morning and reminded me that when our first child was this old I was lucky to get dressed by dinner time - sad, but oh so true.

And I had had a fairly productive morning - I even listened to the presidential debate while feeding the baby and making lunches (was it just me or was it pretty lame?).  I realized that when I said, "I never get anything done" I really was saying, "I haven't had any time to sew and I am stressed that I won't be able to finish the two quilts that I want to enter in the QuiltCon Show and the deadline is November 1st!!  Augh!!"

Neutral Prism Quilt
(Oops....I paused here in the writing process to load some pictures and put the kids in the bathtub and while the pictures were loading, I browsed the QuiltCon site and saw that the entry deadline is Nov. 30.  So no worries, although I would like to get the quilts finished and move on to other things.  Plus I just like to sew and regular sewing time is always a good thing, right?  And now that I know the date is farther away maybe I could finish a third quilt?  Got to make my life stressful, right?  Are you planning to go to QuiltCon?)

Anyway...the original point of this story was that we all get things done, they just might not be what we want to get done or they might not get done as fast as we would like, or they may have to be done over and over again (like dishes) but that is the human condition.  It is just a fact of life that work comes before quilting - so sad but so true.  

And yeah, I know I will miss these times with my little ones when they are all grown up and I have more sewing time.  But right now I keep telling Becca-Babe that I need her to print me out a daily schedule of nap/fussy times so I can plan my life/naps/sewing around her better.  But so far she hasn't provided me with one.  Sigh...a girl can dream, right.  :)

Tuesday, October 16, 2012

Skill Builder Sampler Roundup!


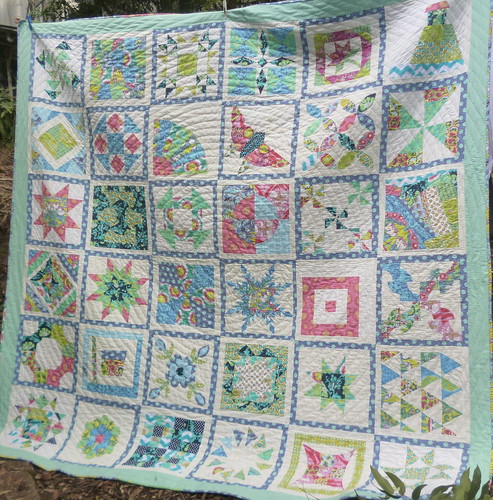
Yea!!!  I finally finished sewing my We Can Do It! Skill Builder Sampler blocks together!!  I love how they look!  I love all of the things that I have learned doing this sampler!  I can't believe that just a year ago I had never tried paper piecing, or inset seams and that I was scared of templates and curved piecing!  I still don't like tracing templates and cutting fabric without my rotary cutter but now I know it isn't impossible.  :)


I decided to sew my blocks together into three different quilts for my three girls that share a room.  (Got to have matching quilts, right?)  Aleah really liked the star blocks, so I pulled all the blocks that had a star feel for her.  Thankfully, Colleen was enamored with the flower and butterfly blocks, so she got them.  Her quilt has a more cohesive/matchy feel, but I like them both.

I put my very favorite stars in the middle of Aleah's quilt.  They aren't perfect but man do I like them and am quite proud of the learning and effort that went into making them.

I love the look of applique blocks on this quilt and am sure to be doing more of it in the future too!  Practice makes perfect.

I pulled some of my favorite blocks from the group to make Kate's little quilt.  I really like how this group looks together!  We made so many fun blocks this year!

And now I proudly present the beautiful work of those who participated long term in the Skill Builder Sampler!!!

(Disclaimer:  Not all of the pictures on flickr would let me copy them and I am brain dead from lack of regular sleep, so if your quilt or blocks are not in the mosaic, please forgive me and send me a link to where I can find them and I will add them to the post.)

1. It's Christmas time!, 2. Skill builder Sampler quilt, 3. Skill Builder Sampler, 4. Red and White quilt blocks, 5. skill builder front #2 (7 blocks on back), 6. Skill Builder Quilt Top in progress, 7. skill builder quilt, 8. Skill builder - all done, 9. so far, 10. Skill Builder Sampler 1-18, 11. SBS QAL, 12. DSCN3759, 13. Skill Builder Quilt #2, 14. Skill Builder Sampler Blocks - FINISHED!, 15. All 36 SBS Blocks!, 16. P1030340, 17. DSC_0117, 18. Blocks 1-36, 19. we can do it - skill builder sampler, 20. Skill Builder Quilt #1

I cannot say enough about the beauty and skill represented by these quilts and blocks!   All of the color combos, sashing options and quilting just blow me away.  Please follow the links or pop over to the Skill Builder Sampler Flickr Group and give these ladies some love!  They deserve it!!!  Here are some close ups of finished full sized tops:

Skill builder Sampler quilt
Tanya's - Whenever I saw her blocks I would think, "I really like those colors and fabric...oh wait, we are using the same line of fabric that's why!"  Great minds think alike!  Look at the tiny pieced sashing!  I can't even imagine piecing all of that!  The girl's got skills!

Skill builder - all done
Cassie's-  I love this color combo too!  Consistently beautiful blocks - I love how the quilting makes it all crinkly and ready to cuddle up with.

SBS QAL 
Vanessa's was finished and hand quilted before anyone had even sewn all of their blocks together!  Bee-you-ti-ful!!  It looks like spring!

Skill Builder Sampler
Marlene ran with the We Can Do It! theme for her beautiful quilt.  I love the center panel and We-Can-Do-It colors!  The rivets around the edge are awesome.  What a great reminder of this year of sewing and learning!


Thank you to everyone who participated in the Sampler!  I would never have kept it up and learned all that I did if you weren't following along.  If you are just discovering the We Can Do It! Skill Builder Sampler, please keep making the blocks and posting them to the flickr page!  I will keep checking in and will highlight Skill Builder progress here.  

For those who made all (or almost all) of the blocks but who haven't put them together into a quilt -- get going!  ;)  It makes me feel guilty, knowing that I am leaving you with a stack of blocks cluttering up your sewing area.  Sew it up and show it off to friends and family this holiday season!

Again, Thank You! Thank You!  Thank You! for your support!  
And remember, WE CAN DO IT!

Friday, October 5, 2012

What We Have Been Doing

Quilt by Vanessa Christensen.  Tutorial and picture found at Moda Bake Shop.
Not my baby or quilt, but this is what we have been doing around here lately.  I would probably replace "play" with "fuss/be held" but that wouldn't look as cute on a quilt.

Baby Becca is growing, thriving, learning how to sleep at night and generally being a good baby.  But she is still a baby and I had somehow forgotten how much holding, feeding and changing babies require...especially at night.  Eek.

I did my first bit of sewing on the sewing machine today since she was born and it felt really good.  I should be able to finish up my Skill Builder Sampler quilt tomorrow and will post pictures of all the finished quilts --- if the baby/children cooperate.  Have a great weekend!!

Wednesday, September 19, 2012

Welcome Baby!


Rebecca Jane joined our family last Wednesday!  9lbs 5oz of sweet chubby cuteness for her sisters to manhandle.  :)  Everything went super well and I am recovering quickly, but will probably not post for a bit - there is lots of baby holding and feeding happening over here.  Got to give lots of loves to our Becca Baby.

PS.  Don't think that this lets you off finishing your Skill Builder Sampler Quilt top - I still intend on having a quilt show here of all of the different tops at the beginning of next month.  Post the picture of your SBS top on the flickr group page to be included.  (There might even be a prize!)

Saturday, September 1, 2012

Flower Garden Finish

Last night I finished sewing on the last of the white spacers along the edge of my hexagon quilt!  I love it!  It was a long journey to get here and I am so proud that I really did manage to finish it.

I took a picture of the first five flowers I stitched together back in February 2010.  I was sooo  proud of them.  I felt like I had made so many!  How naive I was. There are 132 flower blocks in the finished quilt so I had a bit more to go.  :)

In the fall of 2010, I had finished about a quarter of the quilt.  That cute little girl started kindergarten this year!

I kept chugging along.  Sometimes months would go by without any work on it and sometimes I would make flowers obsessively.  My favorite time (only time, really) to do handwork is after the kids go to bed.  I love to just sit down and watch some Hulu or Netflix and do English paper piecing.  If I worked fast I could get one flower done an evening.  Let's not even start to think about how much TV watching this quilt represents, ok?  ;)

Early on I found an online offer for twenty-five 1930's reproduction fat quarters for $25!  Sweet!  In retrospect I should have gotten two packets - there is a lot of fabric in this quilt!  The spacers are Kona Unbleached PFD.  It is more cream than Kona white and more white than Kona Snow - the perfect white in my opinion.  The flower centers are Kona Corn and the hexagons are 1 inch a side.

I love the texture on the back!

I got the idea for using three white spacers between the blocks instead of surrounding the blocks in white from the Paper Pieces picture page.  I was afraid if I surrounded each flower in white that I would get bored and give up.  I like how the spacers still give the flowers breathing room, but how I didn't have to stitch as many white hexagons.  Plus it makes it a bit different from other Grandmother's Flower Garden quilts.

I give my husband a bad time about always having to build stuff so sturdily, but I am just as crazy about my sewing.  After making a couple flowers I had my own system for joining the hexagons together which included laying the tail of the thread under subsequent stitches to hold it in place, reinforcing the corners with extra stitches, averaging 18 whip stitches per inch and knotting off the thread at the end twice - once at the end of the stitching and then again back 1/4 inch.  That thread isn't going anywhere.  ;)

Now I just have to decide if I have the guts to hand quilt it.  The part that makes me the most nervous is the fact that where the fabric folds back on itself to make the hexagon shape, I could have 6 layers of fabric plus batting to stitch through. That does not sound easy or fun.  Any advice?  Will quilting this be horrible?  Should I just send it out to be quilted?  (I don't trust myself to machine quilt it after so many hours of work.)

I also have to decide whether or not to applique on a bit of a border or just trim the edges straight.  Binding around each pointy hexagon is not an option, in my opinion.

Hopefully it won't take another 2 1/2 years to finish quilting because I would love to see it on my bed much sooner than that!

I am linking up to the Festival of Hexagons (lots of fun hexie projects there!) and At the End of the Hallway.

If you want more info on how to English paper piece, you can check out this tutorial.