Showing posts with label improv.. Show all posts

Tuesday, September 26, 2017

Heather Ross Mini Spool Quilt


Hello all!

This summer I participated in a Heather Ross mini quilt swap on Instagram. (You can follow me @sewnbyleila)  It was so much fun! I had wanted to make a thread spool quilt forever and this was the perfect excuse.


I wanted the quilt to have a loose "rainbow" order. So, I rummaged through my HR scraps, begged/traded some more scraps from friends, and got to work. The spools are improvisational pieced, which made the final piecing a challenge, but it made for a good variety of shapes and sizes.


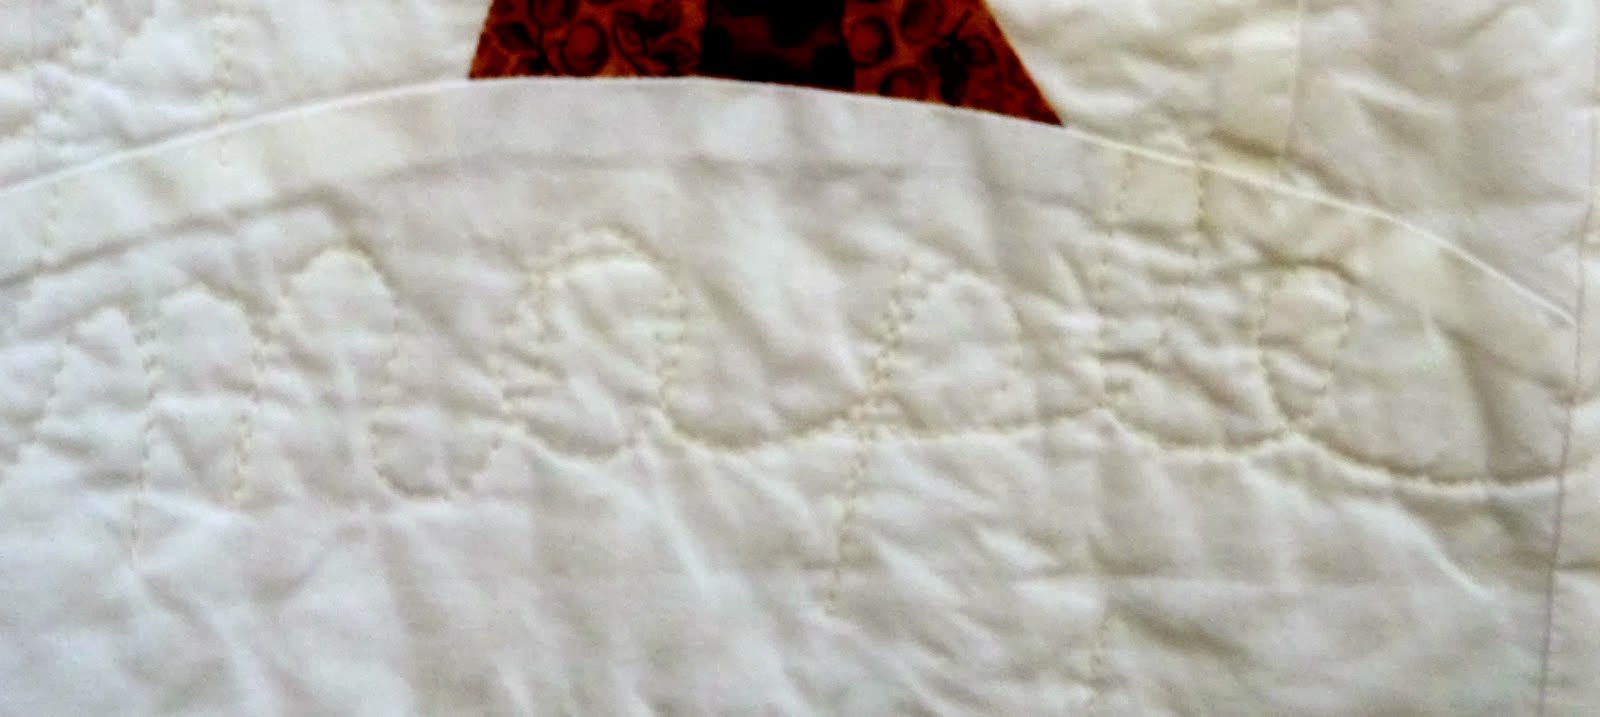
I heavily quilted the background with swirls so the spools would stand out. (Swirls are my go-to free motion quilting motif.) It took awhile, but I love the look. Then I stitched around each of the spools and then quilted a few zigzags across each to mimic thread.


It was a lot of fun to make and I will have to make another one for myself soon!


(An outtake of my quilt holder jumping for joy!)

Friday, February 3, 2017

Got Solids? A Solid Improv. Quilt Finish


Another finish! I really, really like this quilt. It started with a bundle of solid fabric I was given for a guild challenge. I added tons of other solids and it turned into this. 


I wanted it to be twin sized, so I added a gray border to get it up to size. By the end, I was running out of solids (and steam!) and a border seemed like the way to go. One of my big problems was squaring it up. Because of the improvisational piecing none of the sides or corners were square. I tried my, but I still don't think it is completely even.


I decided to mimic the improvisational squares and rectangles in the quilting. It is free motion quilted (vs with a walking foot) so the corners were easier to turn (because there was no turning) but it sometimes maked for some less than square lines and corners.


I decided to use a scrappy binding. It was a great way to use up some solid strips I had hanging around and fits in with the overall feel of the quilt. The binding is stitched down by machine and I decided to add to the "industrial" feel by accentuating the stitching instead of trying to hide it. I used a wide zig-zag with contrasting orange thread. It is super sturdy and pretty darn cute, in my opinion.


This quilt was going to be donated to the International Institute of St. Louis, but as they won't need it for awhile, I am going to donate it to a local women's shelter and the institute will get my next quilt. Its a super cute, super crazy quilt with lots of Denyse Schmidt fabric and color. Stay tuned and have a great weekend!

Tuesday, January 26, 2016

First Finish of 2016: Low Volume Cars for Blake


This quilt has been in the works for awhile, but it is finally done!  I used bits of car themed Echino for the pieced centers of the blocks and then just kept sewing fabric around them improv-log cabin style until they were at least 12.5" square.  Then I trimmed the blocks to size.  I Love that kind of piecing.  It is so freeing to just sew.


I quilted it with free motion squares (here is a link that shows what I tried to quilt more clearly).  The quilting went pretty fast.  I like quilting on a long-arm machine, but when I am using my own machine I kind of just want to get it done.  Fast.


My husband says there should be a contest for who can hold up a quilt the longest.  He thinks he could win.  :)  I think he needs to train more.   We can practice by him letting me take 3x as many pictures.  I also think extra points should be awarded to the person who can hold the quilt the flattest and stillest.  What do you think?

This is my first finish for my Finish-A-Long Goals.  Yea!

Monday, December 7, 2015

Heather Ross Bag


 I finished this bag a few weeks ago.  I have been meaning to use my linen Heather Ross odds and ends to make a bag and finally got around to it.


I used the free Phoebe bag pattern.  I pieced each side on interfacing before cutting out the pieces.  That gave it a little extra weight and something to piece onto.  I knew the strap length was Way Too Short so I lengthened it....and had to do an awkward fix when the bag was finished because the strap needed to be shorter....like the length specified in the pattern.  Note to self: Follow the instructions the first time you use a pattern.  They may know what they are talking about.  :)

The back.
The first time I used it in public I felt kind of odd.  You don't see a lot of peach pieced HR bags out there.  I've gotten over it and it feels normal now.  And it is perfect for me.  It has my favorite fabrics and is the perfect size.  Not too big, not too small and it hangs just right on me.  I can see making another when this wears out.

If you are looking for a handmade Christmas idea this pattern might be a good idea.  If you didn't piece the panels it would go together pretty quickly.

I know in the next couple weeks people are going to start posting pictures of all the cute things they are making for teacher gifts.  While that is great, I decided a couple of years ago that I was just going to buy our teachers books.  Something they will be sure to use and that the whole class can enjoy - and something I can quickly buy in Amazon.  So, if spending 50 hours making teacher gifts isn't in the cards this year, buy the teachers in your life a book.  They'll love it!  :)

Linking to Scraptastic Tuesday.

Tuesday, November 10, 2015

Heather Ross Bag - At Last


I bought some Heather Ross fabric years ago planning to use it to make a bag and last week I finally did!  The coral print with the little girls playing with horses was the inspiration fabric.  I thought about doing the whole bag with that fabric, but then decided that it might be a little much.


So I made a bag with lots of different HR fabrics all improvisationally pieced together.  (To tone it down?)  I picked linen fabrics that were in the warm orange/coral/pink family and then added a punch of aqua (not HR) to keep it from getting to boring.


I used the free Phoebe pattern but lengthened the strap because it was blatantly too short --- and then I had to shorten it back up because the pattern was correct.  Note to self:  Make the pattern as directed the first time round - the author might just know what they are talking about.  :)


I love the inside pockets.  The rose and tape measure fabric are some of my favorites.

Part of me feels kind of silly walking around with a coral patchwork bag but the other part of me knows that everyone else wishes they had one too.  ;)


The Des Moines MQG are having a holiday swap this week and I think I am going to have to make another bag to swap.  The Phoebe bag is a great size and shape and goes together quickly.  And if I am busy sewing then I can put off raking leaves.  Win-win!


Friday, April 17, 2015

Moving Along With the Guild Challenge Quilt

Yesterday I trimmed up the blocks for my challenge quilt.   Leaving the size and piece # pinned on them really helped.  It would have mess otherwise.  Most of the blocks have both pieced and whole strips.  I really like how they look mixed together.


The mix of colors is so calming.  I am hoping it turns out as well in reality as I imagine it will.  Right now I am thinking of quilting it with a wood grain design.

In other news, I cut down a tree this week!  It was small but I am still impressed with myself.  :)  I also divided hostas and peonies, burned leaves and planted peas, lettuce, spinach and turnips.  It looks much more impressive when I write it down than when I look out at the yard at everything else that needs to get done (like cutting up said tree so it isn't laying in the middle of the yard!).  Baby steps, baby steps...  I am loving the spring weather and our beautiful flowers.  They make me happy.  I hope you have a great weekend!


Wednesday, February 18, 2015

Echino Top Finished!


Well, I sewed the 10 extra blocks onto the main quilt this morning.  It went really fast.  Yea!  Unfortunately I used more white Eiffel Tower fabric in the new blocks than I used in the old ones so the left side of the quilt is kind of heavy on white.  But it is probably one of those things that no one else would notice unless you pointed it out.  Which I guess I just did.

I bet no one would notice my daughter's head peeking out over the top of the quilt unless I mentioned it either.  I need to make her do more push ups so she will be able to hold quilts all the way up over her head for loooong periods of time.  You have to have good upper body muscle tone to be in a quilter's family.  :)  Seriously though, I usually take the quilt pictures around here, but I held up a quilt for someone awhile ago and my arms got tired fast.  So I have a bit of empathy.


I think I am going to skip the batting and use fleece to back this.  Has anyone done that?  Good results?  Things to look out for?

Linking up to WIP Wednesday.

Friday, February 6, 2015

Echino Car and Neutral Quilt: Finished-ish


So a few weeks ago I had a really bad day.  Everything seemed completely pointless.  I knew I was just being crazy, but I also knew that I needed something to distract me from how totally blah life was until I snapped out of it.  So I turned on BBC's The Lord of the Rings (LOVE IT!) and started to sew.


I had been crushing on this quilt for a couple of weeks and decided it would fit the bill.  It would be low stress sewing (no matching points or exact cutting) and I could use up the small cuts of Echio fabric that I had been collecting.  I thought it would be fun to make a car inspired quilt for my mechanic brother, but knew it would take a ton of (expensive) Echino to make a full quilt.  With this quilt I could use what I had and fill in the rest with neutrals.  Lots of the neutrals were scraps from my neutral prisms quilt.  Sweet!


I pieced bits of the Echino canvas for the centers and just started adding fabric around them.  I finished up 20 blocks that day.  The only problem is that it is a little on the small side for a grown man.  (48 x 60)  But to make go from 4 x 5 layout to 5 x 6 I need to make 10 more blocks and that feels like a lot.

We'll see what I end up doing.  Maybe improv borders would be faster?  I know I need to finish it, but the I-must-make-that-quilt! itch is gone and I have other projects on my mind.  Ahhh....life is to hard when you have so much fabric.  :)

Have a great weekend!  I am linking up with Finish It Up Friday.

Sunday, October 27, 2013

My Tree Quilt


I posted a quick picture of this quilt in July before I rushed it to the fair but it is past time that it got it's own official post.  I think I have a thing with improvisationally pieced tree quilts.  This is #4. 


Here are three others that I have made.  The one on the top left and the one with the green border were made from bee blocks that I received in 2011.  Looking at all the quilts all together makes me realize that I really like the thin brown border - I think I should have added one to this quilt too - oh, well...


It wasn't all same-o-same-o though.  There were a few new things that I tried with this quilt.  First, the blocks aren't arranged in a grid like in the other quilts.  It made it a bit more of a challenging to piece, but I think I like the look.

maple
leila
I also quilted it with the names of trees.  I marked horizontal lines three inches apart on the quilt and then just started "writing."  It takes a lot of tree names to fill up a quilt!  My husband came up with trees that I didn't even know existed.

By the end I totally ran out of tree names and wrote the names of my children on one line.

I also used quilting to label my quilt.  On the very bottom, I quilted "made by leila gardunia july 2013 h____ iowa."  I think I may label all of my quilts this way from now on.  It's not super easy to read, but a quilt historian would be able to figure it out.  Plus I wouldn't have to worry about making a label.  :)
Poplars
Pine
Some of my favorite blocks.  Although I am rather fond of the cut down tree too.  :)


On our walk back from the photo shoot we saw plenty of other pretty trees.  I love fall.

AmysCreativeSide

I am linking up with the Blogger's Quilt Festival and entering My Tree Quilt in the throw quilt category.  Head on over to see lots of cool quilts!

PS. My next post is my 250th and I have been blogging for 3 years this month!  You may want to check in later this week.  ;)

Follow on Bloglovin

Saturday, December 22, 2012

Improv. Asterisk Block Tutorial

I could have sworn there was a tutorial for this block somewhere out on the web, but I can't find one, so here is my own tutorial for a 12 inch square Improvisational Asterisk Block.  I think a whole quilt of these would be amazing!  (You might also want to check out this Shattered Glass Block Tutorial or this Basic Asterisk Block Tutorial).

To get started:

  • Cut 3 strips approx. 18 inches long and 1.5-2 inches wide
  • Cut 1 square approx. 14 inches to a side


Cut the square in half on the diagonal.
Place one strip between the cut edges.
Sew the strip to each cut edge.

Cut the square in half again at a different angle.
Sew the second strip in between the cut.
Be careful to line up your first strip on either side of your new strip.

Cut the fabric in half again where the two strips intersect.
Sew the last strip to either side of the cut.


Press and trim to 12.5 inches square.
Done!  Easy as pie!

Tune in later to see the finished quilt and have a Very Merry Christmas!


Thursday, March 22, 2012

Improv Tumblers and Fans at the Des Moines Modern Quilt Guild

Leila Presenting

A month ago I taught at the Des Moines Modern Quilt Guild.  I had big plans for my class - amazing ideas for visual aids...and then I got sick.  My plans and ideas got smaller and smaller and more and more basic.  However, it worked out just fine (although I must admit that I had my doubts in the week leading up to the meeting).

Leila's Liberated Fan Block 1

I showed the ladies of our guild how to make improv fans and tumblers.  I think improv fans are my new favorite block and tomorrow I will post step by step instructions for making your own improv fan block as part of the Skill Builder Sampler.  See you then!